How to Record Webcam on Mac – 3 Most Efficient Methods You Should Know
How to record a speech or a lecture on your MacBook via a webcam? Of course, you can simply turn your Mac computer into a webcam recorder without a professional camcorder. If you are using iMac or MacBook, you already have a built-in front webcam. As for the Mac mini, you can insert an external webcam. Just follow our step-by-step guide to use the web recorder to capture onscreen activities via webcam on your MacBook.
 How to Record Webcam
Part 1: How to Record Webcam Video on Mac and PC
4Videosoft Screen Recorder is more than a webcam recorder to capture the webcam footage, but also enables you to capture screen video, microphone voice, system sound and snapshots. Moreover, you can also tweak the video and audio settings, add annotation/watermark/callouts, or even manage the recording files with ease. Just in simple, it provides the pro-level features to capture the webcam footage.
- Record your face and surrounding via internal or external webcam.
- Capture webcam along with screen video, microphone voice, etc.
- Integrate plentiful of custom options, such as video and audio settings.
- Manage and preview webcam video with the built-in media player.
How to Record Video via Webcam on Mac
Step 1Once you have already installed the webcam recorder for Mac, you can launch the program on your MacBook. Choose the Video Recorder option to capture webcam footage. Click the Settings menu to open the Preferences dialog and change the custom options.

Step 2Enable the Webcam option to launch the webcam windows. Just permit the screen recorder to access your webcam. If you want to capture screen along with a webcam, you can enable the Display option and set the recording region to record.

Step 3Click the REC button to begin recording video via webcam on Mac. During the recording process, you can add annotations, shapes, callouts and more other elements into the webcam recording. You can use the Camera icon to take a snapshot for the webcam footage.
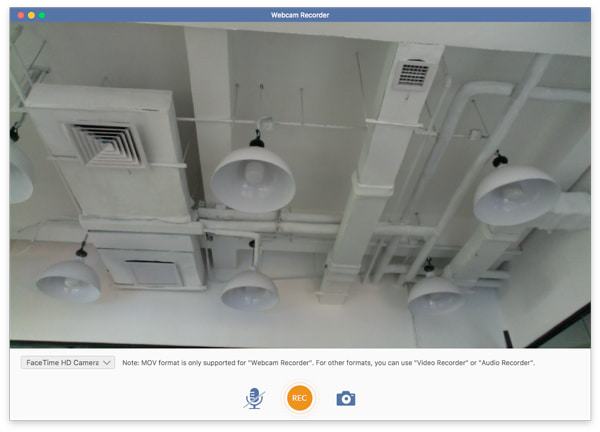
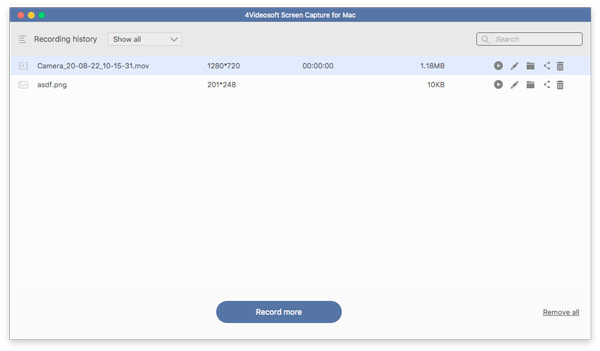
Step 4Wait for webcam recording on Mac to finish, and click the Stop button. Then the preview window will pop up. Here you can check the webcam video and remove unwanted frames with the Clip tool. Finally, you can click on the Save button to export the webcam video to Mac memory.
Part 2: How to Capture Webcam Video with QuickTime Player
QuickTime is more than a media player for Mac, which also enables you to capture video through webcam on Mac. The default Mac webcam recorder requires setting up the webcam beforehand, but some MacBook might be blocked by the configuration.
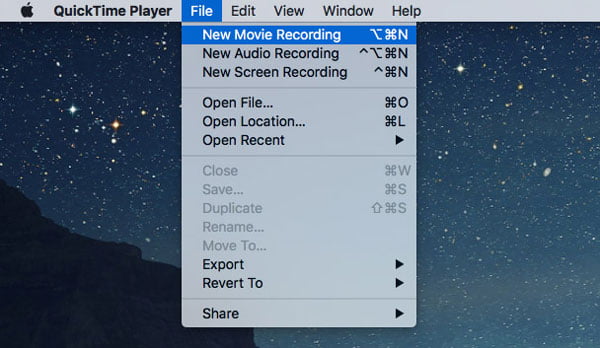
Step 1 Go to the Applications folder, find and open QuickTime Player on your MacBook. Head to the File menu and click the New Movie Recording option to open the webcam recorder.
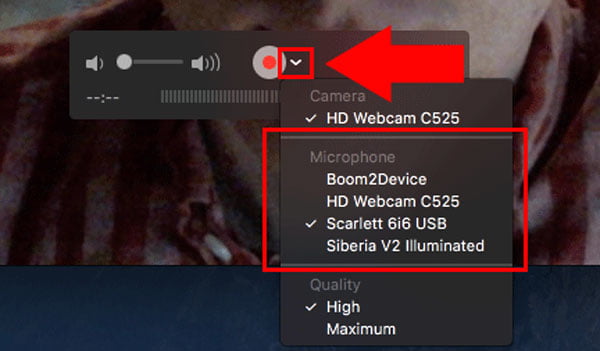
Step 2Click the Arrow icon next to the Record button to open the context menu. Choose your webcam under Camera, select the microphone under Microphone, and decide the video resolution under Quality.
Tip
If you want to record screen along with a webcam, turn on the webcam under Camera and then switch to Screen Recording mode.
Step 3When you are ready to start recording, click the red Record button. It will take several seconds for QuickTime to actually start a webcam recording. When you are done recording, click the Stop button.
Step 4Click the File menu and choose the Save option. Then the Save as dialog enables you to choose the destination folder, enters the file name and click the Save button to save the webcam video in MOV format.
Part 3: How to Record Webcam Video via VLC Media Player
It is well known that VLC is an open-source media player. It helps you play almost all video files on Mac, PC and Linux for free. In addition to video playback, VLC is also a webcam recorder for Mac offers extensive bonus features, such as record video footage via the built-in webcam.
Step 1If you have already installed VLC Media Player, you can find the free webcam recorder in the Applications folder. Launch the program and click the File menu and choose the Open Capture Device option.
Step 2Check the box next to the Video menu, and select your webcam from the dropdown list. Tick the checkbox of Audio and choose your microphone from the dropdown list. Also, check the Streaming/Saving option, which allow VLC to save your webcam video.
Step 3Clcik the Settings button to open the next dialog. Set up the output format in the Encapsulation Method dropdown list and adjust other custom options, and click OK button to confirm it.
Step 4Click the Open button to start recording webcam on your Mac. When you are done webcam recording, click the Stop button at the lower left corner. After video rendering, you will be presented the save file dialog.
You may also want to know how to record FaceTime calls
Part 4: FAQs about How to Record Webcam Videos
-
1. What are The Best Cameras for Recording on PC?
Most of the laptops have the built-in camera for webcam recording. When it comes to PC, you may need to use an external camera. Here are the best cameras for your PC, Logitech BRIO, Logitech C922, Microsoft LifeCam HD3000, Razer Kiyo and LilBit Face Recognition Camera.
-
2. How to Record Webcam with Audio on Mac via QuickTime?
QuickTime is the default method to record webcam footage, but you are not able to capture the system audio files. Of course, you can use a 3rd party plugin to record the desired audio channel, or even choose a professional screen recorder instead.
-
3. What is the Best Webcam Recorder for macOS Big Sur?
Mojave Screen Capture is another recommended webcam recorder to capture webcam footage. If you need to record a connected webcam, instead of the built-in webcam, you can customize the recording area and save the videos to your MacBook accordingly.
Based on the guide above, you should understand how to record videos via webcam on Mac and PC. The webcam is a useful part on laptop and computer. It can capture your face and your surroundings. 4Videosoft Screen Recorder is the best choice to capture webcam footage on both PC and Mac.


 Top 8 Chrome Screen Recorder Extensions to Record Screen on Chrome
 How to Record A Podcast with Ease – 2 Efficient Methods You Should Know
 How to Convert MKV to 3GP


