How to Screen Record on Mac – Here are 3 Most Efficient Methods You Should Know
How to screen record on Mac? When you want to capture gameplay videos, online streaming music, or even videoconferences, what are the best screen recorders for Mac? The article shares 3 most frequently used methods to capture onscreen activities, such as screen video, webcam footage, system sound and more other files. Just learn more details about the processes and choose the desired one accordingly.
 How to Screen Record on Mac
Part 1: Best Method to Screen Record on Mac with Ease
4Videosoft Screen Capture is a versatile Mac screen recorder to capture onscreen activities, such as screen video, microphone voice, system sound, webcam footage and even take snapshots. Moreover, you can also tweak the audio and video settings, set up a time schedule, add watermark/mouse cursor/annotation/shape, or even edit the recording with ease.
- Record all onscreen activities, screen video, microphone, webcam, etc.
- Tweak the frame rate, FPS, video quality, audio codec and more others.
- Add annotations, shapes, watermark, mouse cursor, callouts and lines.
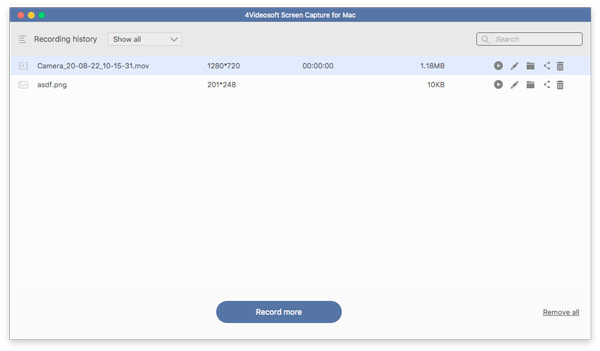
- Manage the recording, such as view, delete, and share to social media.
Step 1Download and install the Mac screen recorder, you can launch the program on your MacBook. Go to the Preferences menu from the screen recorder to tweak the video format, video codec, frame rate, screenshot formats and more other settings.

Step 2Go back to the home interface, you can choose the Video Recorder menu and select the Custom option. It enables you to tweak the recording area. Moreover, you can enable the Camera option to add webcam footage, or add the microphone audio with Microphone option.

Step 3During the recording process, you can click the Edit icon to draw on the recording, or even add annotation, watermark, shapes, callouts and more other elements according to your requirement. You can click the Camera icon to take snapshots with ease.

Step 4When you have screen recorded on Mac, you can just click the Stop button to get the desired video. It enables to trim the videos, adjust the audio volume, or even have a re-record. Once you have clicked the Save button, you can manage the recording as desired.
Part 2: How to Screen Record on Mac with macOS Mojave and Above
If you have already updated to macOS Mojave or above operation systems, you can use the built-in shortcut to screen record on the MacBook. Just press Shift + Cmd + 5 key combination and you'll get an on-screen menu giving you various recording options.
Step 1Once you have pressed the Shift + Cmd + 5 key combination, there will be a control bar at the bottom of your screen. It enables you to record the entire screen, record a selected portion of the screen, or even capture a still image of the whole screen.
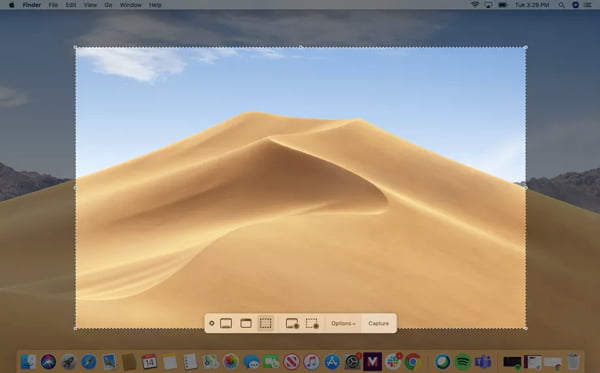
Step 2When you want to set preferences, you can click on the Options to use the built-in microphone, set up a timer, save to a desired location, show mouse cursor, show floating thumbnails when recording onscreen activities on your MacBook.
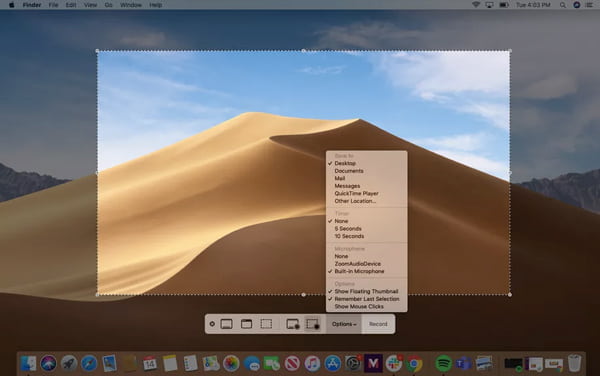
Step 3Choose the desired recording mode and drag its edges to shrink or expand the recording area. Of course, you can also choose the full screen before clicking the Record button in the options menu at the bottom of the MacBook screen.
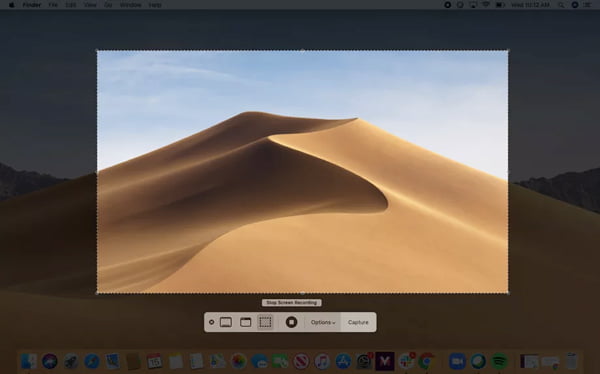
Step 4To stop recording, you can either press the Stop button in the right corner of the menu bar at the top of the screen or press Command + Control + Esc. It will save screen recordings as MOV files automatically, or share the files to social media websites.
Note
In order to manage the screen recording, you can play the screen recording, trim the files, share to social media websites, or even delete the videos according to your requirements. (Find screen recorder for Windows here)
Part 3: How to Screen Record on Mac with QuickTime Player
You can simply use QuickTime Player to screen recorder on Mac. It enables you to capture the screen video, as well as the built-in microphone. As for macOS Catalina or above versions, you can open up QuickTime Player and choose New Screen Recording to open up the Screenshot app.
Step 1Launch the QuickTime Player. You can click on the File menu in the top menu and select the New Screen Recording option. It also enables you to record screen on your MacBook, and even record screen for the connected iOS devices.
Step 2There is a pop-up window labeled the Screen Recording option. Click the arrow next to the record button for recording options, such as choosing to record audio from your computer's external microphone or to show your mouse clicks.
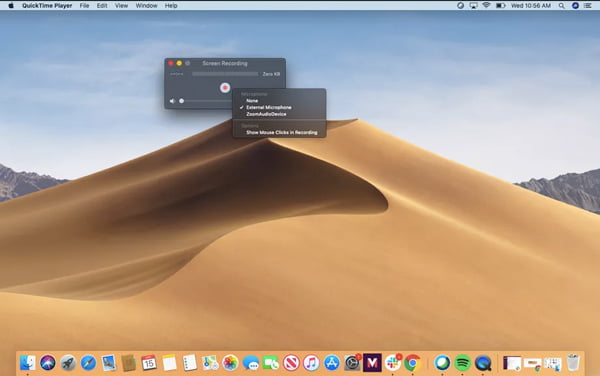
Step 3After that, you can click on the Stop button to screen record on your MacBook. To record the entire screen, click anywhere on the screen, or even drag to select a desired recording area, then click the Start Recording option within that area.
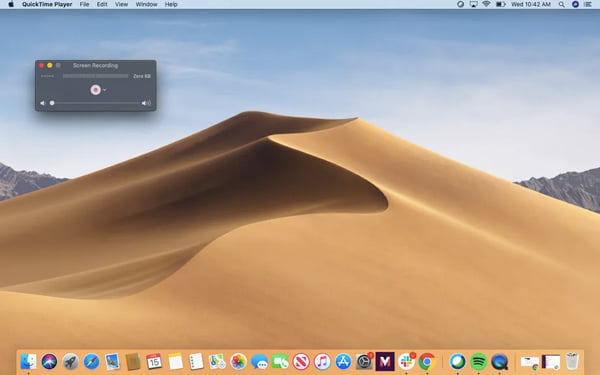
Step 4To stop recording screen on your MacBook, you can either click on the Stop button in your top menu bar or press the Command + Control + Esc keyboard. After that, you can directly open the recorded videos and edit the files accordingly.
Part 4: FAQs about How to Screen Record on Mac
-
1. How to Enable the System Audio Recording on MacBook?
QuickTime only enables you to record the microphone audio only. When you want to record internal audio files, you can download some plugins, such as Soundflower to capture the desired audio. Of course, you can also use some alternative professional screen recorder instead.
-
2. What is the Best Video Editor for Recorded Videos?
Once you have recorded screen on your MacBook, you can simply use the video footage recorded with QuickTime Player, or the captured files with the screen-recording tool in iMovie and Final Cut Pro, and even share the files straight to YouTube.
-
3. Will I Need A Professional Mac Screen Recorder?
If you find a desired Mac screen recorder with a high price, will you take it into consideration? When you have some professional video editors, such as Final Cut Pro and more others, you can simply screen recording on a Mac to get some video clips for further editing.
How to screen record on Mac with ease? Apple has released a new screen-recording feature in macOS Mojave or above operation systems. Of course, you can also use the default QuickTime Player to capture the desired videos with ease. Of course, you can also use the 4Videosoft Screen Capture is a versatile Mac screen recorder you can take into consideration.


 Record FaceTime – Here are 2 Efficient Methods to Capture FaceTime Calls on iPhone and MacBook
 5 Best Voice Recorders for PC/Mac to Capture Audio Files with Microphone
 Top 10 Best Webcam Recorders for Windows, Mac, Linux and Online


